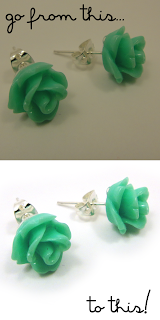
I promised a tutorial on editing the lightbox photos, so here we go! For this tutorial, I will be using gimp, a free editing software available online. The tools are essentially the same as those found in photoshop or paint shop, but I'm not sure how transferable this tutorial is to other programs. Don't forget you can click on the edges of photos on my blog to make them bigger.
I'm starting with this picture of bottle cap earrings made from Landshark. The only thing I've done to this photo so far is scale it down 50%. Step One is to go to "Colors" on the top toolbar and select "Levels."
You're going to click on the white dropper tool, circled in red, and then click on an area of your background in the photo. See how much that changes it? I selected one of the lighter areas, and then accepted the changes.
My picture is now much brighter! However, I wasn't satisfied with the shadowing towards the outside, so I cut it out. I used the freehand selection tool to delete those areas.
Almost there! You can see that this left a definite line in my photo from deleting it. I went ahead and ran through my levels again to brighten and clean it up. Finally, I cropped the picture down to 1620x1620, which is the size I'm trying to make all my images. (Arbitrary, but consistent.)
Isn't that so much better? And pretty easy! I've been messing around in editing software for a long time, so this wasn't bad for me - I hope it was easy to follow if you are new to editing!
How is your photo editing going? What program are you using? Let me know in the comments!


2 comments:
Wow, Annie! This tutorial seems super easy and yet I needed it=). I've been using something else to edit my photos (another free online thing) and I could never get the levels right. Good job!
Your pictures look great though! I didn't give up on making lightboxes because I saw the success you were having! :)
Post a Comment