Showing posts with label jewelry. Show all posts

Wednesday, October 2, 2013

New Etsy Listings

Yesterday, I had a couple big assignments that I decided to neglect in favor of some jewelry photography, editing, and listings.

I pulled out a big bag of clearance jewelry and my light box. The bag was full of items that I found myself not displaying at shows because I 'didn't have room' - but really, it was because the pieces didn't fit my personal style any more and they didn't inspire me. Lacking inspiration, I decided to clearance the pieces rather than repurpose them.

I had a great time. Photographing necklaces seems much harder that photographing earrings! I definitely need a better camera. Mine doesn't have a macro setting, so parts of my picture are out of focus no matter how hard I try. I used gimp for editing, and began listing on etsy. Listing takes much longer than I remember! I was watching United States of Tara while I was working, and it was taking me about an episode and a half for each listing. Phew! I only got through three, but I have some more photos edited and ready to go.
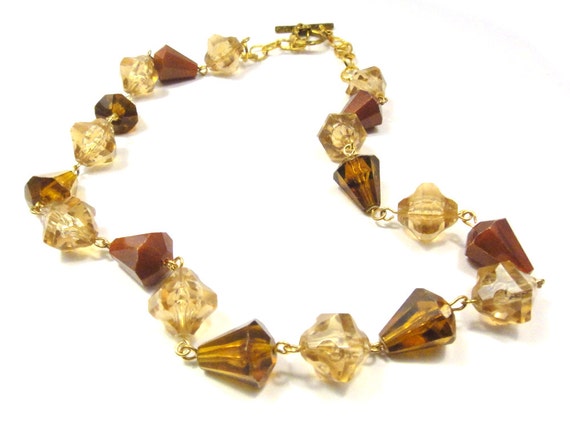
I'm pretty proud of the pictures, but I need to work on my listing expertise. Anyone have any helpful tips? Any articles you found valuable? Let me know in the comments!

Saturday, September 28, 2013

First Show: Pumpkin Patch

Today was my first craft show of the season. I barely got everything done that I wanted to do-but it looked great!

My mom helped me out big time by supplying a couple big shutters, painting them, and drilling holes for me. But she is promising me a pink drill, so I can drill my own holes soon! :)

I really wanted a nice way to display all my earrings together, in a way that was easy on the eye. It totally worked out!

My business/earring cards took by far the most of my time, and I seriously under estimated how many I needed! I have a lot of hole punching and tea staining to do for next week. Bad news? My fancy hole punch is already failing! It's roughing up the edges. :(

More bad news? I've lost all my Halloween stuff from last year! I whipped some up real quick, but still sad! I hope I find it.

Friday, September 13, 2013

editing lightbox photos

I promised a tutorial on editing the lightbox photos, so here we go! For this tutorial, I will be using gimp, a free editing software available online. The tools are essentially the same as those found in photoshop or paint shop, but I'm not sure how transferable this tutorial is to other programs. Don't forget you can click on the edges of photos on my blog to make them bigger.

I'm starting with this picture of bottle cap earrings made from Landshark. The only thing I've done to this photo so far is scale it down 50%. Step One is to go to "Colors" on the top toolbar and select "Levels."

You're going to click on the white dropper tool, circled in red, and then click on an area of your background in the photo. See how much that changes it? I selected one of the lighter areas, and then accepted the changes.

My picture is now much brighter! However, I wasn't satisfied with the shadowing towards the outside, so I cut it out. I used the freehand selection tool to delete those areas.

Almost there! You can see that this left a definite line in my photo from deleting it. I went ahead and ran through my levels again to brighten and clean it up. Finally, I cropped the picture down to 1620x1620, which is the size I'm trying to make all my images. (Arbitrary, but consistent.)

Isn't that so much better? And pretty easy! I've been messing around in editing software for a long time, so this wasn't bad for me - I hope it was easy to follow if you are new to editing!

How is your photo editing going? What program are you using? Let me know in the comments!

the night is dark and full of terrors

But I brightened it up!

I love trying to be creative in my photographs. I love incorporating natural elements, and using the nice bright sunshine. I have a couple problems, though. The neighborhood gives me some strange looks when I wander around with handfuls of jewelry and a digital camera, for one. Secondly, I simply find lightbox photos to be far more professional and attractive! I've been searching for the perfect box for quite some time. I've tried cardboard boxes, tissue paper, various light sources, pledging my first born, and extensive photo editing and never got a result with which I was satisfied. Until today, that is!

The solution was simpler than I ever would have thought, given to me courtesy of The Pretty Pickle. I only had to buy a couple lights - which I wanted for fall's craft shows anyway - and a clear plastic storage box. Easy peasy! Read the full tutorial here.

When I was taking the pics, I was floored because they were so much nicer than any other lightbox method I had tried! They looked great on my camera! When I transferred them to my computer, I was dismayed to find they were a little darker than I thought. So, I brought them into gimp, my trusty free photoshop substitute.

I plan to post a complete tutorial on lightening photos from lightboxes, but I stayed up far later than planned piddling around with this project. Any success or failure stories in photographing your products? Let me know if this one works for you!